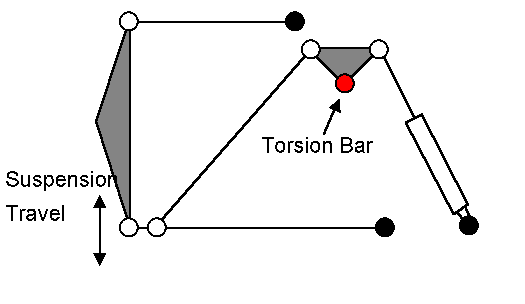
Some of the advantages of this arrangement are:
That last point deserves a little clarification. In the diagram above the angle between the bellcrank and pushrod is 90° - the torsion bar is assumed to be in it's "neutral" position (more on that later). Whether the suspension rises or falls, the bar will get a load applied to it. So, for a start, there is a positive spring rate in both bump and rebound.
Now, on to rising rate. Because the angle between the pushrod and bellcrank changes as the suspension moves, the effective lever arm length acting on the torsion bar changes too. Here's a graph of the angular travel of the torsion bar (X-axis) for 100mm of bump and 60mm of droop travel. The layout that produced this graph is very similar in dimensions to a "standard" Locost front suspension, with the bellcrank situated a little below the top chassis rail.
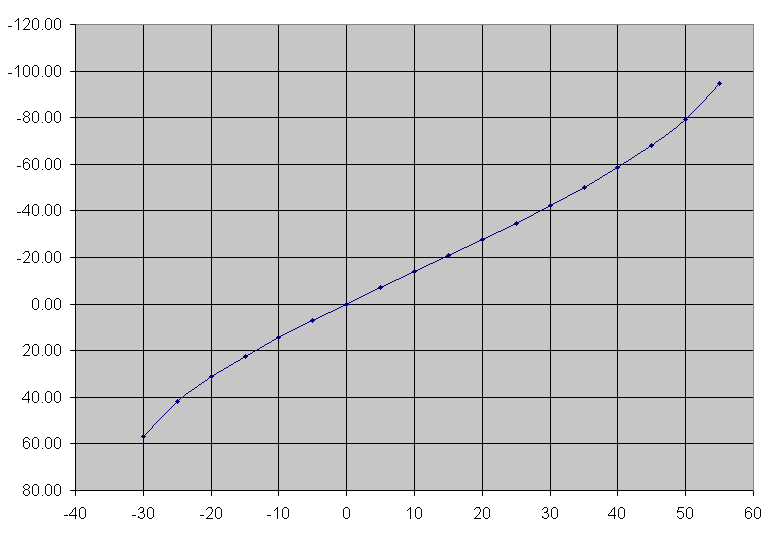
As you can see, the graph has a hysteresis type curve with the angular change rising throughout the travel in both directions.
The next question is: How do I mount a torsion bar?
The following diagram shows one end of a conventional antiroll-type torsion bar mounted longways on a chassis rail and connected to the bellcrank by a simple bracket. Note that the pivot axis of the bellcrank and the torsional axis of the bar are in line. This is important to minimize stresses in the connection between the crank and bar.
Does the torsion bar pivot (shown left of the bend) have to have low friction
(ie needle roller) bearings? I suspect that something like a D-shape
poly-bush, as used in aftermarket anti-roll bar mounts, will be more than
sufficient. Time will tell. 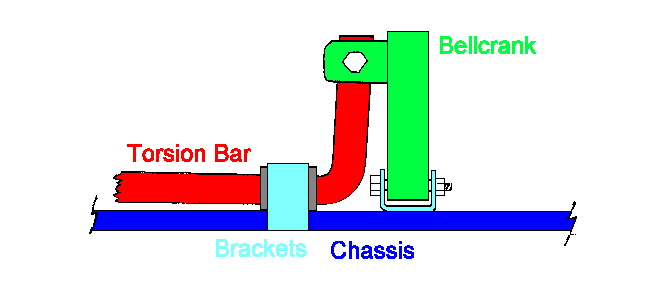
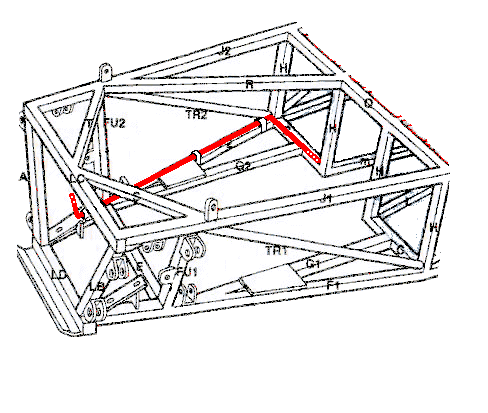
The next diagram shows a notional layout for a bar mounted low on the chassis of a Locost. It doesn't show the bell crank, pull rod or any other suspension components.
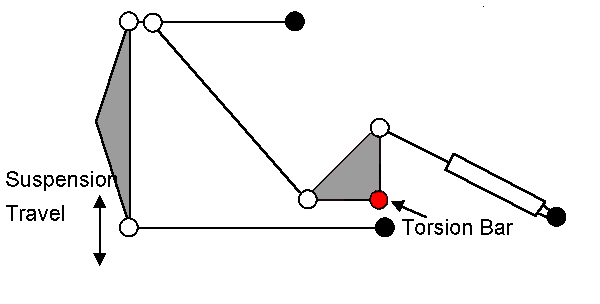
Here's a pullrod version of the first diagram:
The open space in the center of the chassis (open in my mid-engined design of course, not in a front-engine Locost) will be used for the battery, spare wheel and radiator ducting.
There's more to come on this page (still), but this will have to do for now. Comments and queries are invited.